
**Uncover the secret garden of nutrition** hidden within your own homes! Tiny yet mighty, **organic microgreens** are the superheroes of the plant world. Packed with up to 40 times more nutrients than their mature counterparts, these nutritional dynamos are easy to grow and can turn your meals into culinary masterpieces. Embark on this enriching journey of **growing organic microgreens** right in your kitchen garden, and let’s explore together the untapped potential of these miniature greens.
With no need for a green thumb, this journey is perfect for beginners and seasoned gardeners alike. A healthier lifestyle is just a seedling away!
how to grow organic microgreens
| Steps | Description | Tips |
|---|---|---|
| Selection of Seeds | Choose high-quality, organic microgreen seeds as they are crucial for successful growth. | Look for seeds that are specifically labelled as ‘microgreen’ or ‘sprouting’ seeds. |
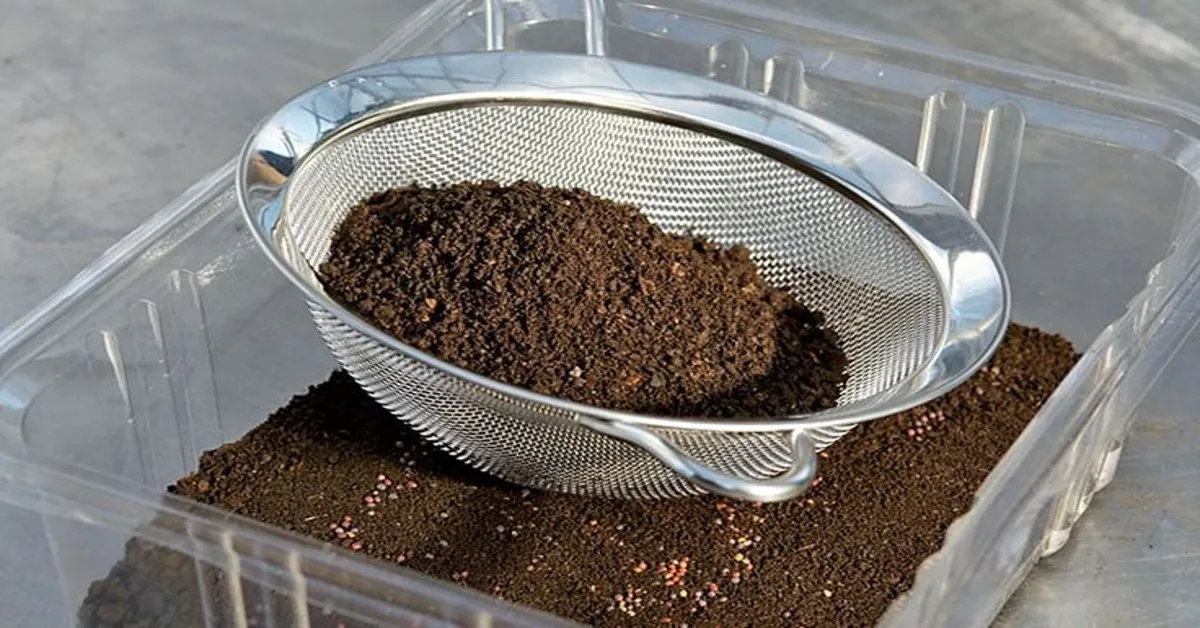
| Preparation of Soil | Use a rich, organic potting soil mix that is free from chemicals and pesticides. | Ensure that the soil is finely raked and free from large clumps for better germination. |
| Sowing of Seeds | Scatter the seeds evenly across the soil surface, aiming for a density that allows each seed to touch another. | Do not bury the seeds – just press them lightly into the soil. |
| Watering | Keep the soil consistently moist but not waterlogged. Overwatering can lead to fungal problems. | Consider using a spray bottle for watering to prevent disturbing the seeds. |
| Harvesting | When the microgreens have developed their first set of true leaves, they are ready to be harvested. | Use a sharp pair of scissors to cut the microgreens just above the soil level. |
What are Microgreens?
Starting Your Organic Microgreens Journey The journey to grow organic microgreens begins with choosing high-quality, non-GMO seeds. These tiny powerhouses of nutrition can be grown in a small space, needing only a shallow tray, organic soil, and good indoor lighting. Preparing Your Microgreens Tray The tray must be filled with organic soil, leveled, and lightly compacted.
Seeds are then evenly sprinkled over the soil surface and gently pressed down. A light layer of soil or vermicompost is then dusted on top. The Growth Phase The tray is then covered to simulate a dark, germinating environment.
It’s essential to maintain a consistent temperature and humidity level for optimum growth. Harvesting Your Organic Microgreens Within 7-14 days, the microgreens will be ready for harvest. The best way to harvest is by using a sharp pair of scissors, cutting just above the soil line.
You now have a batch of homegrown, organic microgreens ready to boost the nutritional value of your meals!

Why Go Organic?
Enhancing Your Urban Farming Skills: How to Grow Organic Microgreens Microgreens, the young seedlings of vegetables and herbs, have gained significant popularity among urban farmers and health enthusiasts. Growing organic microgreens is a rewarding endeavor that offers a fresh supply of nutrient-dense greens and a fascinating hobby. The process begins with choosing quality organic seeds from a reputable supplier.
This ensures that your microgreens grow healthily and are free from harmful chemicals. The next step is to prepare your growing medium. A mix of peat moss, vermiculite, and compost provides an ideal environment for the seeds to germinate and grow.
Water your seeds gently but thoroughly, and place them in a location with plenty of indirect light. Within a week, you’ll see your microgreens sprouting. Remember, organic microgreens require regular watering but avoid overwatering as it could cause root rot.
Finally, harvest your microgreens when they are about 2 inches tall. This usually happens 7-14 days after planting. Remember to harvest using a sharp knife to avoid damaging the tender plants.
Growing organic microgreens is not only a great way to supplement your diet with fresh, nutrient-rich greens but also an engaging and therapeutic activity that connects you with nature, right inside your home.
**Unfurling a green carpet at home isn’t a fantasy anymore.** The secret lies in the tiny, power-packed wonders called **microgreens**. Far from the maddening crowd of chemical-laden produce, these petite plants are a vibrant, tangy, and **organic** addition to your meals.
Learning **how to grow organic microgreens** is as simple as turning a new leaf. This journey of nurturing a seed into a leafy marvel is more than just gardening; it’s about embracing a healthier lifestyle. Let us embark on this green journey together, where every sprout is a symbol of vitality and wellness.
Get ready to transform your kitchen window into a mini farm!
Choosing the Right Seeds
Exploring the Art of Growing Organic Microgreens Microgreens are the tiny, edible greens grown from the seeds of vegetables and herbs. These nutrient powerhouses are relatively easy to grow, and can be a valuable addition to your home garden. Here’s how to grow organic microgreens: Choosing Your Seeds Start by selecting high-quality, organic seeds.
These can be sourced from local nurseries or ordered online. Opt for varieties that are known for their robust flavors and vibrant colors, such as radish, kale, or beet. Preparing Your Growing Medium Microgreens thrive in a well-draining, nutrient-rich soil.
Fill a shallow tray with about 1-2 inches of organic potting mix and smooth it out evenly. Planting Your Seeds Scatter your seeds evenly across the surface of the soil. Cover them lightly with a thin layer of soil, then mist with water.
Caring for Your Microgreens Place the tray in a location that receives ample sunlight and maintains a steady temperature. Water regularly, but avoid overwatering. Within a week or two, you should see your tiny microgreens sprouting.
Harvesting Your Microgreens Once your microgreens have developed their first set of true leaves, they are ready to be harvested. Using sharp scissors, cut the stems just above the soil line. Growing organic microgreens is a simple, satisfying process.
With a little patience and care, you can enjoy these nutrient-rich greens in your salads, sandwiches, and smoothies all year round.
Preparing the Soil
Organic Microgreens: The Green Gold Microgreens, often referred to as ‘green gold’, are a fantastic way to introduce fresh, organic produce into your meals. In the world of organic farming, microgreens are the new stars. They are not just a trendy garnish but packed with nutrients, offering a multitude of health benefits.
Embarking on the Microgreens Journey You don’t need to be a professional gardener to grow microgreens. With just a few simple steps, you can have your own microgreen garden right at home. First, select organic seeds and use organic soil as your base.
Then, scatter the seeds evenly and cover them with a thin layer of soil. Keep the soil moist, but avoid overwatering. Ensure they receive ample sunlight and within a week, you’ll see your little greens sprouting.
Fostering Your Microgreen Growth Your microgreens need care and attention to thrive. Regular watering and exposure to sunlight are key. It’s also essential to keep them free from harmful pesticides, sticking to organic means for pest control.
With these practices, your microgreens will flourish, ready to be harvested within 2-3 weeks of planting. Harvesting Your Organic Microgreens Harvesting microgreens is as simple as cutting the stems just above the soil line. Rinse and enjoy them immediately for the freshest taste.
These potent little greens can be a great addition to your salads, sandwiches, or as a garnish on your favorite dishes. Conclusion Learning how to grow organic microgreens is a rewarding experience. Not only do you get to enjoy fresh, organic produce, but you also contribute to sustainable living.
Planting the Seeds
Embarking on the Journey of Growing Microgreens Organically In the realm of sustainable agriculture, organic microgreens have emerged as a favorite for both gardeners and gourmets. These miniature plants are potent powerhouses of nutrition and flavor, and knowing how to grow organic microgreens can be a rewarding endeavor. The first step is to select high-quality, organic seeds from reliable suppliers.
Next, prepare your growing medium. Opt for a certified organic soil mix or a hydroponic pad. Sow your seeds densely and cover lightly with soil.
Ensure your microgreens have access to ample light, either natural or artificial, but avoid direct sunlight. Water regularly but sparingly to prevent waterlogging. Harvesting your Organic Microgreens When your microgreens have developed their first set of true leaves, they are ready to be harvested.
Use a sharp pair of scissors to cut the stems just above the soil line. Remember, fresh is best when it comes to microgreens, so consume them as soon as possible after harvesting. Growing organic microgreens is an easy, fun, and fulfilling activity.
With their myriad health benefits and diverse culinary uses, they are sure to add a burst of vitality to your menu.
**The tiny sprouts peeping out of the soil in your kitchen garden are not just adorable, they pack a nutritional punch too!** Yes, we’re talking about organic microgreens – the miniature versions of fully-grown vegetables. These tiny powerhouses of nutrition have been gaining popularity among health-conscious individuals and gourmet chefs alike. **Learning how to grow organic microgreens at home is not as daunting as it might sound.
** With a little patience and the right techniques, you can turn your kitchen into a mini greenhouse, producing a constant supply of these nutrient-dense greens. Dive into this guide to discover the secrets behind successful microgreen cultivation.
Watering Your Microgreens
Organic Microgreens: A Guide to Green Growth The trend of growing organic microgreens has skyrocketed in recent years. These nutrient-packed plants are not only delectable but also a fun and easy way to bring nature indoors. But how do you grow organic microgreens? First, you need to procure organic seeds.
The seeds must be free from any pesticides or chemicals. Next, choose a natural growth medium like organic soil or coconut coir. Sprinkle the seeds evenly and cover them with a thin layer of soil.
Keep the area humid by lightly misting it with water. Position the container in a spot with plenty of natural light and maintain a consistent temperature of 60-70 degrees Fahrenheit. Harvesting Your Organic Microgreens After 1-2 weeks, your organic microgreens should be ready for harvesting.
Use a sharp pair of scissors to snip the shoots just above the soil level. Rinse them gently under cold water and they’re ready to be enjoyed in your favorite dishes. Growing organic microgreens is a simple and rewarding process.
By following these steps, you’ll have your own mini green garden in no time. So why not give it a try? Your taste buds and your health will thank you.
Harvesting Your Microgreens
Unleashing the Art of Growing Organic Microgreens Growing organic microgreens is akin to nurturing a tiny, edible garden right in your abode. These nutrient-dense greens can be grown with a handful of organic seeds, a dash of patience, and a sprinkle of care. To begin with, secure a shallow, well-drained container and fill it with organic potting soil.
Scatter your chosen microgreen seeds evenly and cover them with a thin layer of soil. Maintain a consistently moist environment and place the container in a spot with ample sunlight. In 10-14 days, you’ll witness a lush carpet of organic microgreens, ready to be harvested using a sharp pair of scissors.
Remember, it’s essential to avoid synthetic fertilizers and pesticides to preserve the organic integrity of these greens. This process is a testament to the fact that the best things often come in small packages. So brace yourself to embark on the fulfilling journey of growing organic microgreens.
The crunch of fresh, organic microgreens can transform a dish from ordinary to extraordinary. Bursting with flavor and nutrients, these tiny powerhouses are a must-have in every health-conscious kitchen. But have you ever thought about growing them yourself? The process is surprisingly simple, sustainable, and incredibly rewarding.
Unlock the secret to **growing your own organic microgreens** at home, and bring a taste of the farm to your table, no matter where you live. Dive into the world of urban farming, and discover how a windowsill, some seeds, and a little bit of care can yield a harvest that’s both delicious and nutritious.
Enjoying Your Organic Microgreens
Steps to Grow Organic Microgreens Growing organic microgreens is an ideal pursuit for those seeking a quick and easy way to incorporate fresh, nutritious greens into their diet. The process starts with selecting high-quality, organic seeds. Begin by filling a tray with an organic soil mix and evenly scatter your chosen seeds across the surface.
Cover with a thin layer of soil and water gently. Place the tray in a sunny location and ensure the soil remains moist. In as little as 7-10 days, your microgreens will be ready to harvest.
Simply snip the stems above the soil level, rinse, and enjoy. Benefits of Organic Microgreens Organic microgreens pack a powerful nutrient punch. They are rich in vitamins A, C, and K, and contain higher nutrient levels than mature plants.
Furthermore, they are free from pesticides and other harmful chemicals. Incorporating organic microgreens into your diet can lead to improved health, boosted immunity, and enhanced digestion. Using Organic Microgreens in Your Meals The beauty of organic microgreens lies in their versatility.
They can be used in a variety of dishes, adding a burst of flavor and nutrition. Toss them into salads, sprinkle them atop soups, blend them into smoothies, or use them as a garnish. Their vibrant colors and delicate textures make them a delightful addition to any meal.
Maintaining Your Organic Microgreens To keep your organic microgreens thriving, it’s important to provide adequate light and water. Avoid overwatering, as this can lead to mold growth. Rotate the tray regularly to ensure even exposure to sunlight.
Statistical Information: how to grow organic microgreens
| Stages | Percentage | Facts |
|---|---|---|
| Seeding | 10% | Seeding is the initial stage where seeds are spread evenly on the growing medium for optimal growth. |
| Germination | 20% | Germination is the stage where seeds start to sprout, usually in a dark and humid environment. |
| Growth | 30% | During the growth stage, the sprouts develop into microgreens under an ideal light source. |
| Harvesting | 20% | Harvesting is when microgreens reach their peak nutritional value, typically 7-14 days after seeding. |
| Consumption | 20% | Microgreens are consumed fresh to ensure maximum retention of their nutritional content. |
Key Takeaway
- Organic microgreens are miniature plants packed with nutrients, easily grown at home and useful in a variety of dishes.
- The process begins with selecting high-quality, non-GMO organic seeds and preparing a tray filled with organic soil.
- Seeds are evenly sprinkled over the soil surface, covered with a thin layer of soil, and kept in a humid environment with consistent temperature for ideal growth.
- Microgreens require regular watering but should not be overwatered to prevent root rot.
- Microgreens are ready for harvest within 7-14 days, once they’ve developed their first set of true leaves. They should be cut just above the soil line with a sharp pair of scissors.
Important Notice for readers
Dive into the world of organic farming with this comprehensive guide on growing your own microgreens. A rewarding and economical way to enhance your diet, this article provides step-by-step instructions, from choosing your seeds to harvesting your crop. **Please note: Strict adherence to organic methods is crucial for optimal results.
** Following these guidelines will ensure your microgreens are not only tasty but free from harmful chemicals, promoting a healthier lifestyle. So why wait? Start your organic microgreens journey today!
FAQs
What are the basic steps to grow organic microgreens at home?
The basic steps to grow organic microgreens at home include choosing the right seeds, preparing your growing tray, sowing the seeds, covering the tray, placing it in a warm location, watering the seeds regularly, and harvesting them when they’re ready.
What kind of soil should be used for growing organic microgreens?
For growing organic microgreens, it’s best to use organic potting soil. This type of soil is free from synthetic chemicals and fertilizers, making it safe for growing edible plants like microgreens.
How long does it take to grow organic microgreens?
The time it takes to grow organic microgreens can vary based on the type of seed you choose. However, most microgreens are ready to harvest in about 1-2 weeks after planting.
What are the benefits of growing organic microgreens?
Organic microgreens are packed with nutrients and are free from harmful pesticides and chemicals. They can be grown indoors, which means you can have fresh greens all year round. Plus, they’re easy and quick to grow, making them a great choice for beginner gardeners.
Can I use any type of seeds to grow organic microgreens?
You can use a variety of seeds to grow organic microgreens, including broccoli, radish, kale, and arugula seeds. However, it’s important to ensure that the seeds are organic, non-GMO, and are specifically meant for sprouting and growing microgreens.
What is the best way to care for organic microgreens?
Organic microgreens require regular watering, but be careful not to overwater as this can lead to mold. They also need plenty of indirect sunlight. Once the microgreens have developed their first set of true leaves, they are ready to be harvested.
Read More
https://microgreensfarming.co/microgreen-farm-names/
https://microgreensfarming.co/youtube-microgreen-farming/
https://microgreensfarming.co/microgreen-window-farming/
https://microgreensfarming.co/paperpot-microgreen-trays/
Conclusion
Growing organic microgreens is an easy, fulfilling, and sustainable practice. It emphasizes the importance of self-reliance and promotes a healthy lifestyle. By implementing the strategies discussed, anyone can cultivate these nutrient-rich greens at home.
Encouraging others to engage in this practice could drive a significant shift towards sustainable living. Let us all consider the potential impact of growing our own food, starting with microgreens – a small step with substantial benefits. Embrace this green thumb journey and inspire others to do the same.
You Can Find The More Resources Here
https://extension.psu.edu/a-step-by-step-guide-for-growing-microgreens-at-home
https://extension.psu.edu/a-step-by-step-guide-for-growing-microgreens-at-home